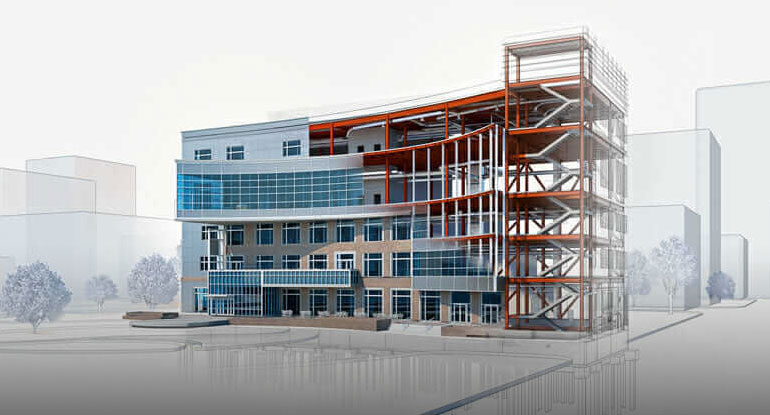
Building Information Modelling (BIM)
Why BIM?
BIM used for planning, design, construction, and operation of the facility. It helps architects, engineers, and constructors visualize what is to be built in a simulated environment to identify any potential design, construction, or operational issues.
What are the unique features of the training?
Hands-on training with real cases to create the BIM model (3D) and simulate it to manage time (4D) and cost (5D)
Who can participate?
Under/post Graduate Students, Diploma, Execution Engineers, Cost controller, Project Managers, Planning Engineer, contract manager, BIM Modeller, Team Lead, Architecture, Structural Engineer, Project Leader, BIM Engineer.
What are the benefits?
After completion of this course, learners will able to
- Assist BIM Coordinators in creating, updating, and revising BIM Models throughout the project life cycle
- Create and update BIM Models based on contract drawings and latest information
- Ensure integrity/ quality of the models
- Generate documentation and shop drawings for BIM Models
- Produce BIM Model deliverables for Construction, documentation, and fabrication
- Provide an accurate accounting of time spent on projects with descriptions for each time entry on a weekly basis
- Review all works done for completeness and accuracy and maintain Model/ Drawings quality standards as per practice
- Develop BIM Models with the correct parameters and attributes for BIM Based quantification and 4D simulation
- Identify issues for BIM Coordinators where discrepancies occur during design stage
- Ensures compliance with the approved BIM Execution and BIM Scope Plans
- Setting up project base files
- Assemble composite design models for coordination meetings
- Facilitate use of composite design models in design coordination/clash detection meetings and provides detection reports by the identification and resolution of all hard and soft collisions
- Coordinate BIM file exchange and archiving of milestone submittals
- Identify clashes and generate the reports
- Simulate the model and run it
How the evaluation done?
Before the course begins, the participants will evaluate himself/herself against the skills sets required to become the BIM Modeller. There will be continuous assessment through live case study and evaluation will be done to verify the development of skills.
BIM Duration?
The average duration of BIM is 50 hours. Participants needs to practice on BIM to become experts.
Course Contents of BIM Training
| Main Topic | Sub Topic | Duration (Hrs) |
|---|---|---|
| 1. BIM & Revit Overview Presentation |
1.1 Define and demonstrate BIM for AEC Industry |
1.5 |
| 2. Revit Introduction |
2.1 System Settings 2.2 Project Template 2.3 Demonstrate Revit User Interface 2.4 Start a Project 2.5 Review Existing Projects |
1 |
| 3. Define Element Properties |
3.1 Import/Link CAD Data 3.2 Manage Links 3.3 Define Properties of an element 3.4 Able to Link CAD Data 3.5 Manage Links |
1 |
| 4. Site Design |
4.1 Topo surface 4.2 Split & merge Surface 4.3 Using subregion 4.4 Add Building Pad 4.5 Site component 4.6 Label contour |
1 |
| 5. Start Laying Plan |
5.1 Wall 5.2 Wall Properties 5.3 Compound wall 5.4 Wall sweep and Reveal 5.5 Stacked Wall 5.6 Opening in a Wall |
2 |
| 6. Construction Modelling |
6.1 Modify tools 6.2 Create Parts 6.3 Create Assemblies 6.4 Assembly Views 6.5 Editing tools |
2 |
| 7. Add components |
7.1 Add Door, windows, components 7.2 Add Floor 7.3 Edit floor sketch 7.4 Sloped floor 7.5 Create Ceiling |
2 |
| 8. Add Roof |
8.1 Roof Opening 8.2 Create Roof by footprint, Extruded Roof 8.3 Roof Opening 8.4 Shaft opening |
2 |
| 9. Add Dimensions |
9.1 Temporary Dimension 9.2 Permanent Dimension 9.3 Modify Dimensions 9.4 Dimension Styles |
1 |
| 10. Structural Modelling |
10.1 Create Structural Model by adding structural content |
1 |
| 11. Adding curtain wall |
11.1 Creating curtain wall 11.2 Modify Curtain wall 11.3 Adding curtain Door Panel 11.4 Embedded walls |
2 |
| 12. Add staircase |
12.1 Creating stairs 12.2 Modify Stair types 12.3 Create Railing 12.4 Modify railing types 12.5 Create Ramp |
2 |
| 13. Massing study |
13.1 Create Mass family 13.2 Modify solid/void forms 13.3 Convert conceptual mass into building element |
2 |
| 14. Detailing and Schedules |
14.1 Create detail views 14.2 Drafting view 14.3 Insert detail items 14.4 Quantification & 14.5 Material take-off |
1 |
| 15. Area plan views and color fill legend |
15.1 Create area plan views 15.2 Assign colour fill legend 15.3 Legend views |
1 |
| 16. Managing views |
16.1 Create Floor plan views 16.2 Ceiling plan views 16.3 View properties 16.4 Elevation views 16.5 Section views 16.6 3D views 16.7 Visibility graphics |
1 |
| 17. Sheets |
17.1 Title blocks 17.2 Adding sheet 17.3 Views composition onto sheet 17.4 Print |
1 |
| 18. Revit MEP |
18.1 Introduction to Autodesk® Revit® MEP, its interface, including viewing, drawing, and editing commands 18.2 Working with linked architectural files 18.3 Creating and modifying views 18.4 Understanding Autodesk Revit MEP systems in general 18.5 Creating spaces and zones 18.6 Analyzing heating and cooling loads 18.7 Working with HVAC module to add air terminals, mechanical equipment, and create HVAC systems 18.8 Working with the Piping module to add mechanical equipment as well as creating hydronic piping systems 18.9 Working with fixtures, piping systems, and analysis tools in the Plumbing module 18.10 Working with re protection systems 18.11 Working with components, circuits, cable tray, and conduits in the Electrical module 18.12 Creating and annotating construction documents 18.13 Adding tags and creating schedules 18.14 Detailing in Autodesk Revit MEP |
14 |
| 19. Getting Started with Navisworks |
19.1 Introduction of Navisworks 19.2 Opening the Files 19.3 Export models from Revit 19.4 Appending & Merging |
1 |
| 20. Model Navigation and View |
20.1 The Navigation bar 20.2 Walking through your Model 20.3 The Orbit Tool 20.4 Looking Around 20.5 The Gravity Tool 20.6 The View cube 20.7 Using Viewpoint 20.8 Changing render Style 20.9 Sectioning the Model |
1.5 |
| 21. Models Reviews and Adjustments |
21.1 Measurements 21.2 Add Comments and Redlines 21.3 Hide objects 21.4 Move objects 21.5 Rotate objects 21.6 Scale objects 21.7 Add object properties |
1.5 |
| 22. Group & Sort |
22.1 The Selection Tree 22.2 Finding objects 22.3 Saving Sets 22.4 The Selection Inspector |
1 |
| 23. Clash Detective |
23.1 Set Clash Rules 23.2 Select objects to be Clashed 23.3 Get Clash results 23.4 Group clash Results 23.5 Create clash Reports |
2 |
| 24. Quantification |
24.1 Set up the workbook 24.2 Taking off the entire model 24.3 Export Take-offs |
1 |
| 25. The Time liner |
25.1 Adjust Simulation Appearance 25.2 Create Tasks 25.3 Import tasks from an external source 25.4 Assign a selection set to a task 25.5 Run the movie 25.6 Configure Simulation 25.7 Export Simulation |
1 |
| 26. The Animator |
26.1 Create saved Viewpoint Animation 26.2 Animate objects |
1 |